#beef
#bacon
#cheeseburger
#garlic-butter
#family-dinner
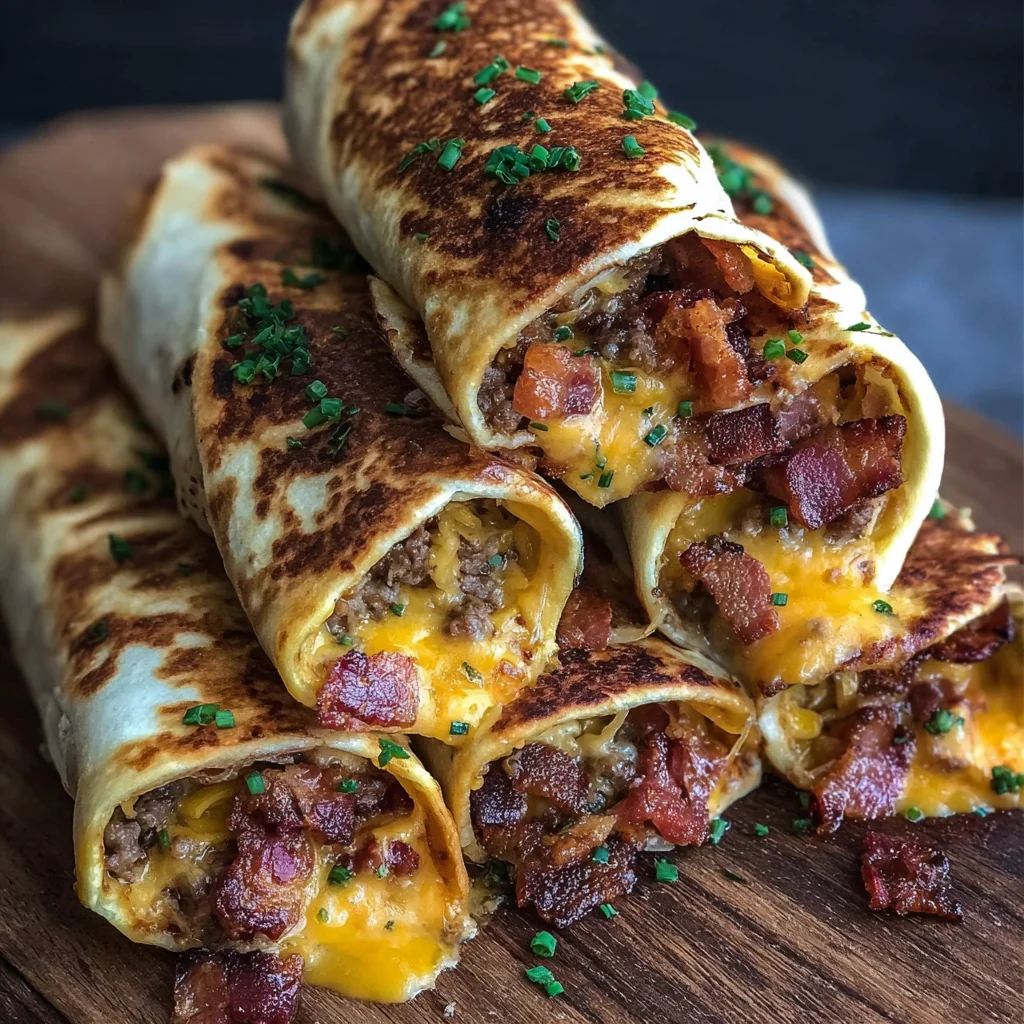
Garlic Butter Bacon Cheeseburger Rollups with Melty Cheese are what I make when burger night needs to feel quicker, neater, and a little more fun. You still get the beef, bacon, cheddar, pickles, and buttery garlic edge, but every bite is wrapped into a crisp spiral.
The filling is cooked first, which keeps the tortillas from turning soggy and makes the bake time short. Freshly shredded cheese melts into the beef instead of sitting in stiff pockets.
Serve them as a casual dinner with salad, or slice them smaller for a game-day tray. They are best warm, when the cheese stretches and the garlic butter is still fragrant.
The Melty Cheeseburger Lineup
Use sturdy flour tortillas and freshly shredded cheese here. Thin tortillas tear when rolled, and bagged cheese can melt grainy because of the anti-caking coating.
- Ground beef. Gives the rollups their juicy cheeseburger base and cooks quickly in a skillet.
- Bacon. Adds smoky crunch and a salty edge that cuts through the rich cheese.
- Cheddar cheese. Brings the classic burger flavor and melts into the beef.
- Mozzarella cheese. Adds the stretchy pull that makes each slice feel extra cheesy.
- Flour tortillas. Wrap the filling tightly and bake into crisp golden spirals.
- Ketchup and mustard. Season the beef with familiar burger flavor without needing a separate sauce.
- Dill pickles. Add tang and keep the filling from tasting heavy.
- Garlic butter. Browns the tortillas, perfumes the whole pan, and makes the edges taste like garlic bread.
- Parsley or chives. Finish the rollups with a fresh, oniony bite.
Garlic Butter Bacon Cheeseburger Rollup Method
- Brown the beef. Cook the ground beef with onion in a skillet until no pink remains, breaking it into small crumbles so the rolls slice cleanly.
- Season the filling. Drain off extra fat, then stir in ketchup, mustard, garlic powder, onion powder, salt, pepper, bacon, and chopped pickles. Let it cool for a few minutes so it does not melt the cheese too early.
- Fill the tortillas. Brush each tortilla lightly with garlic butter, then scatter beef, cheddar, and mozzarella over the center. Leave a border at the sides so the filling has room to settle.
- Roll them tight. Roll each tortilla into a snug log and place it seam-side down on a lined baking sheet. A firm roll keeps the cheese inside while the edges crisp.
- Bake until golden. Brush the tops with more garlic butter and bake at 375°F until the tortillas are browned and the cheese is bubbling, about 12-15 minutes.
- Rest and slice. Wait 3 minutes before cutting. The cheese thickens slightly as it sits, which gives you neater spirals.
Keep the Filling Tidy
The best rollups start with a filling that is flavorful but not wet. After the beef browns, spoon off the fat before adding ketchup and mustard. You want the mixture glossy, not saucy. If liquid pools in the pan, cook it for another minute before you fill the tortillas.
Ground beef should be cooked to 160°F for food safety. The USDA safe temperature chart is the simple reference I use for ground meats. Since the filling is already cooked, the oven step is mostly about crisping the tortilla and melting the cheese.
Cheese That Melts Cleanly
Cheddar gives these rollups their cheeseburger taste, but mozzarella is what gives you that stretchy pull when you slice them warm. I like sharp cheddar for flavor and low-moisture mozzarella for melt. Shred both from a block if you can. It takes a minute and the texture is noticeably smoother.
If you want a stronger garlic butter flavor, look at the filling style in Garlic Butter Beef Cheeseburger Rollups. For a softer party snack with the same buttery idea, Easy Garlic Butter Cheese Bombs are a good match on the tray.
Swaps For Busy Nights
Turkey bacon works if you want a lighter rollup, though it will not be as smoky. Swap cheddar for Monterey Jack, pepper jack, or Swiss. A spoonful of finely diced jalapenos gives heat, while sauteed mushrooms make the filling taste more like a steakhouse burger.
Low carb tortillas work too. They are often more delicate, so warm them for a few seconds before rolling. If you want the same burger flavor with fewer carbs, try Low Carb Bacon Cheeseburger for another dinner option.
Storage And Reheating
Cool leftovers completely, then store them in an airtight container in the fridge for up to 3 days. Reheat in a 350°F oven or toaster oven until hot and crisp. The microwave works in a pinch, but it softens the tortilla and can make the cheese oily.
For longer storage, freeze the unbaked rollups in a single layer, then move them to a freezer bag. The FoodSafety.gov cold storage chart is useful when checking general fridge and freezer timing.
Serve Them Like Dinner
For dinner, serve these with pickles, a crunchy salad, or roasted potatoes. For a party tray, slice each roll into 4 pieces and set out burger sauce, ranch, ketchup, and mustard. They also sit nicely beside Bacon Cheeseburger Bombs with Dipping Sauce if you are building a full appetizer spread.
Keep the rolls warm on a low oven setting for a short time, but do not cover them tightly. Steam softens the tortilla, and the crisp edges are half the reason people reach for another piece.
Summary
These cheeseburger rollups are crisp outside, juicy inside, and built for sharing. Keep the filling drained and the rolls tight for the cleanest slices.
FAQs
Yes. Cook and cool the beef filling, then assemble the rollups up to 8 hours ahead. Keep them covered in the fridge and brush with garlic butter right before baking.
You can, but the texture will be softer and breadier. Bake crescent dough rollups at the package temperature until the dough is fully cooked and golden, and use less filling so the seams do not split.
Do not overfill the tortillas. Leave a small border at the edges, roll tightly, and place them seam-side down. Letting the beef cool for a few minutes also helps the cheese melt slowly instead of rushing out.
Freshly shredded cheddar gives strong burger flavor, while mozzarella adds stretch. Monterey Jack is a good swap if you want a creamier melt, and pepper jack works when you want heat.
Freeze them after assembly but before baking. Wrap tightly, freeze up to 1 month, then bake from frozen at 375°F until hot in the center, adding about 5 minutes to the cook time.
Serve the rollups with pickles, a crisp salad, fries, or roasted potatoes. Ranch, burger sauce, ketchup, mustard, and garlic aioli all work well for dipping.
Use low carb tortillas and skip the ketchup or use a no-sugar version. The rolls will still be rich and cheesy, but check the tortillas because some soften faster during baking.
Garlic Butter Bacon Cheeseburger Rollups with Melty Cheese
Crisp tortilla rollups packed with seasoned beef, smoky bacon, cheddar, mozzarella, pickles, and glossy garlic butter.
Ingredients
- For the beef filling
- 1 tablespoon olive oil
- 1 lb (450 g) 85/15 ground beef
- 1/2 cup (75 g) finely diced yellow onion
- 1 teaspoon garlic powder
- 1 teaspoon onion powder
- 1/2 teaspoon kosher salt
- 1/4 teaspoon black pepper
- 2 tablespoons ketchup
- 1 tablespoon yellow mustard
- 8 slices cooked bacon, crumbled
- 1/3 cup (50 g) finely chopped dill pickles, patted dry
- For the rollups
- 6 large 10-inch flour tortillas
- 1 1/2 cups (170 g) shredded sharp cheddar cheese
- 1 cup (115 g) shredded low-moisture mozzarella cheese
- For the garlic butter
- 4 tablespoons (56 g) unsalted butter, melted
- 2 cloves garlic, finely minced
- 1 tablespoon chopped parsley or chives
- 1/4 teaspoon kosher salt
Good to know
- Use freshly shredded cheese for the smoothest melt.
- Cook ground beef to 160°F before filling the tortillas.
- Best served warm while the tortillas are crisp.
Equipment
- Large skillet
- Baking sheet
- Parchment paper
- Pastry brush
- Small mixing bowl
- Sharp knife
Allergens
- Milk
- Wheat
- Gluten
- Pork
Nutrition facts
- Calories: 530
- Fat: 34 g
- Carbs: 31 g
- Protein: 27 g

