As spring arrives and the garden begins to wake up, iris enthusiasts know that April is a critical time for iris maintenance. The care you give now can set the stage for a vibrant summer display of blooms. Irises, with their striking flowers and sword-like foliage, are a favorite among gardeners, but their rhizomes require a bit of attention to keep them healthy and thriving.
These hardy perennials can be prone to a variety of issues if not regularly checked. Whether you’re a seasoned gardener or a newcomer to iris cultivation, performing these nine critical rhizome checks this April will ensure your irises are in top shape and ready to flourish. From inspecting for pests to evaluating soil conditions, each step is crucial in nurturing a stunning iris garden.
1. Inspect Every Rhizome for Soft Spots, Rot, and Mushiness
The first step in ensuring healthy irises is a thorough inspection of the rhizomes. Gently dig around the rhizomes to expose them and check for any soft spots, mushiness, or signs of rot. A healthy rhizome should be firm and solid to the touch. If you find any mushy or rotten areas, it’s important to cut them away with a clean, sharp knife to prevent further decay. In cases where entire sections are affected, consider removing and discarding those to prevent the spread of rot.
Rhizome rot is often caused by overwatering or poor drainage, so addressing these issues promptly is essential. Ensuring that the rhizomes are exposed to air and not buried too deeply can help prevent these problems from recurring.
2. Check for Borer Entry Holes and Hidden Insect Damage
Iris borers are a common pest that can wreak havoc on your plants. Look for small holes in the rhizomes or sawdust-like frass around the base of the plant, which are telltale signs of borer activity. These pests burrow into the rhizomes, causing significant damage that can lead to rot and plant death.
To manage this problem, remove any affected rhizomes and destroy them. Insecticidal treatments may also be necessary if the infestation is severe. Regularly monitoring your irises for signs of borers and other insect damage is a proactive way to protect your plants.
3. Look for Leaf Streaks, Spots, and Other Disease Red Flags
The foliage of your irises can provide important clues about their health. Examine the leaves for any streaks, spots, or discoloration, which could indicate fungal diseases such as leaf spot or rust. These diseases can spread quickly, particularly in wet or humid conditions.
To control fungal infections, remove and dispose of affected leaves to prevent the spread of spores. Fungicidal sprays can also be applied as a preventative measure. Ensuring good air circulation around your plants by spacing them appropriately can help reduce the risk of disease.
4. Confirm Rhizomes Are Properly Exposed and Not Buried Too Deep
Irises prefer to have their rhizomes partially exposed to sunlight. Check that your rhizomes are not buried under more than a thin layer of soil or mulch, as this can lead to rot. Ideally, the top of the rhizome should be visible above the soil surface.
If you find that your rhizomes are buried too deeply, carefully remove some of the soil to expose them. This will allow them to dry out between waterings and prevent moisture accumulation that can lead to decay.
5. Assess Crowding and Decide Which Clumps Need Dividing
Over time, iris clumps can become crowded, which can hinder their growth and blooming potential. April is an excellent time to assess whether your irises need dividing. If the rhizomes are tightly packed and the blooms have been decreasing over the years, it’s time to divide them.
Using a sharp spade or knife, divide the clumps into smaller sections, ensuring each has a healthy rhizome and a few leaves. Replant them at the proper spacing of about 12 to 24 inches apart to give them room to grow and flourish.
6. Examine Roots and Soil for Drainage Problems and Waterlogging
Irises require well-drained soil to thrive. Check the root zone and surrounding soil for signs of waterlogging or poor drainage, which can lead to rhizome rot. If you notice standing water or overly saturated soil, consider amending your garden bed with organic matter or sand to improve drainage.
Raised beds or mounds can also be an effective solution for improving drainage, particularly in areas with heavy clay soils. Ensuring proper drainage will help maintain the health of your irises and prevent moisture-related issues.
7. Hunt for Weeds, Grass Encroachment, and Competing Plants
Weeds and grass can quickly overtake iris beds, stealing nutrients and water from your plants. In April, take the time to remove any weeds or grass that have encroached on your iris patch. Hand pulling is often sufficient, but be careful not to disturb the rhizomes.
Applying a layer of mulch around your irises can help suppress weeds while retaining soil moisture. However, be cautious to keep mulch away from direct contact with the rhizomes to avoid moisture retention that could lead to rot.
8. Evaluate Foliage Cleanup and Remove Old, Dead, or Damaged Leaves
Cleaning up the foliage is an important task in preparing your irises for the growing season. Remove any old, dead, or damaged leaves to improve air circulation and reduce the risk of disease. Use clean, sharp scissors or pruners to cut the leaves near the base.
Disposing of the removed foliage away from your garden area is crucial to prevent the spread of any pests or diseases that may be present. This simple cleanup step will help your irises focus their energy on producing new growth and blooms.
9. Review Feeding and Mulching Needs Before Peak Growth Begins
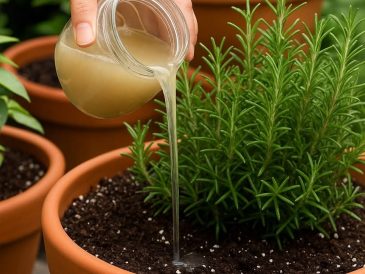
As irises prepare to enter their peak growth phase, it’s important to ensure they have the nutrients they need. Apply a balanced, slow-release fertilizer around your plants, but be careful not to over-fertilize, as this can lead to lush foliage with fewer blooms.
Consider applying a thin layer of mulch to conserve moisture and regulate soil temperature, taking care to keep it away from the rhizomes. Providing the right nutrients and mulching appropriately will support robust growth and a stunning floral display in the months to come.